Print, sign and file your notes
Preview the note in the GES-style sheet, export it, then file the signed copy the way your school expects.
1. Open the preview
From the lesson note workspace, click Preview. The preview shows the sheet as it will print: subject, class, class size, week, term, strand, sub-strand, indicators, resources and each lesson day.
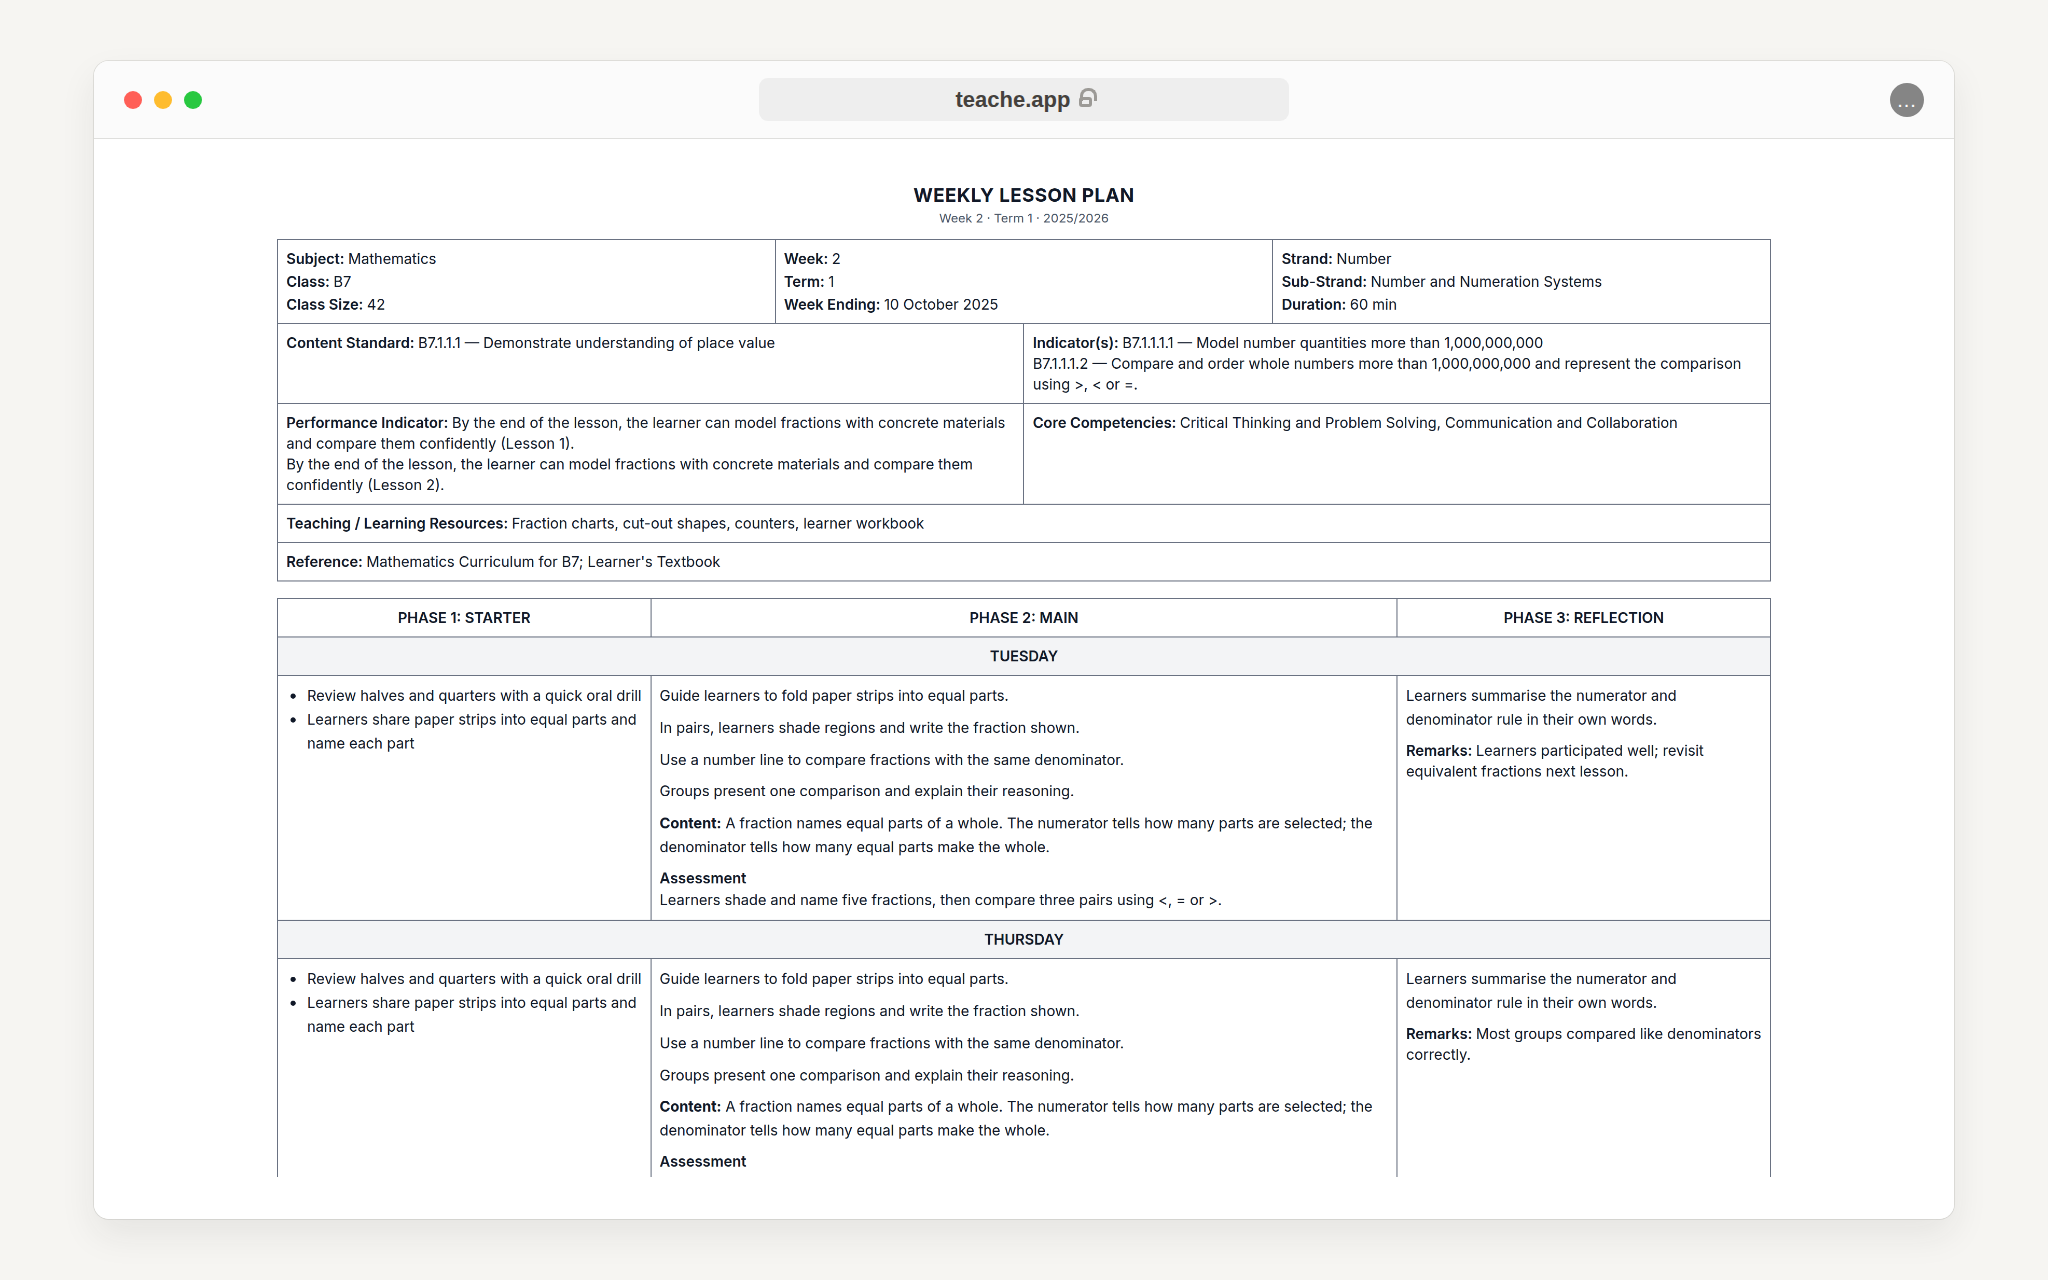
2. Check the header details
If the school, district, region, current term or academic year is wrong, fix it under Settings. If the class size or classroom resources are wrong, fix the class under Classes.
The Reference and Remarks fields print too. Reference is for the curriculum or textbook. Remarks are attached to each lesson after teaching, and they also feed the record of work.
3. Print, save as PDF, or download Word
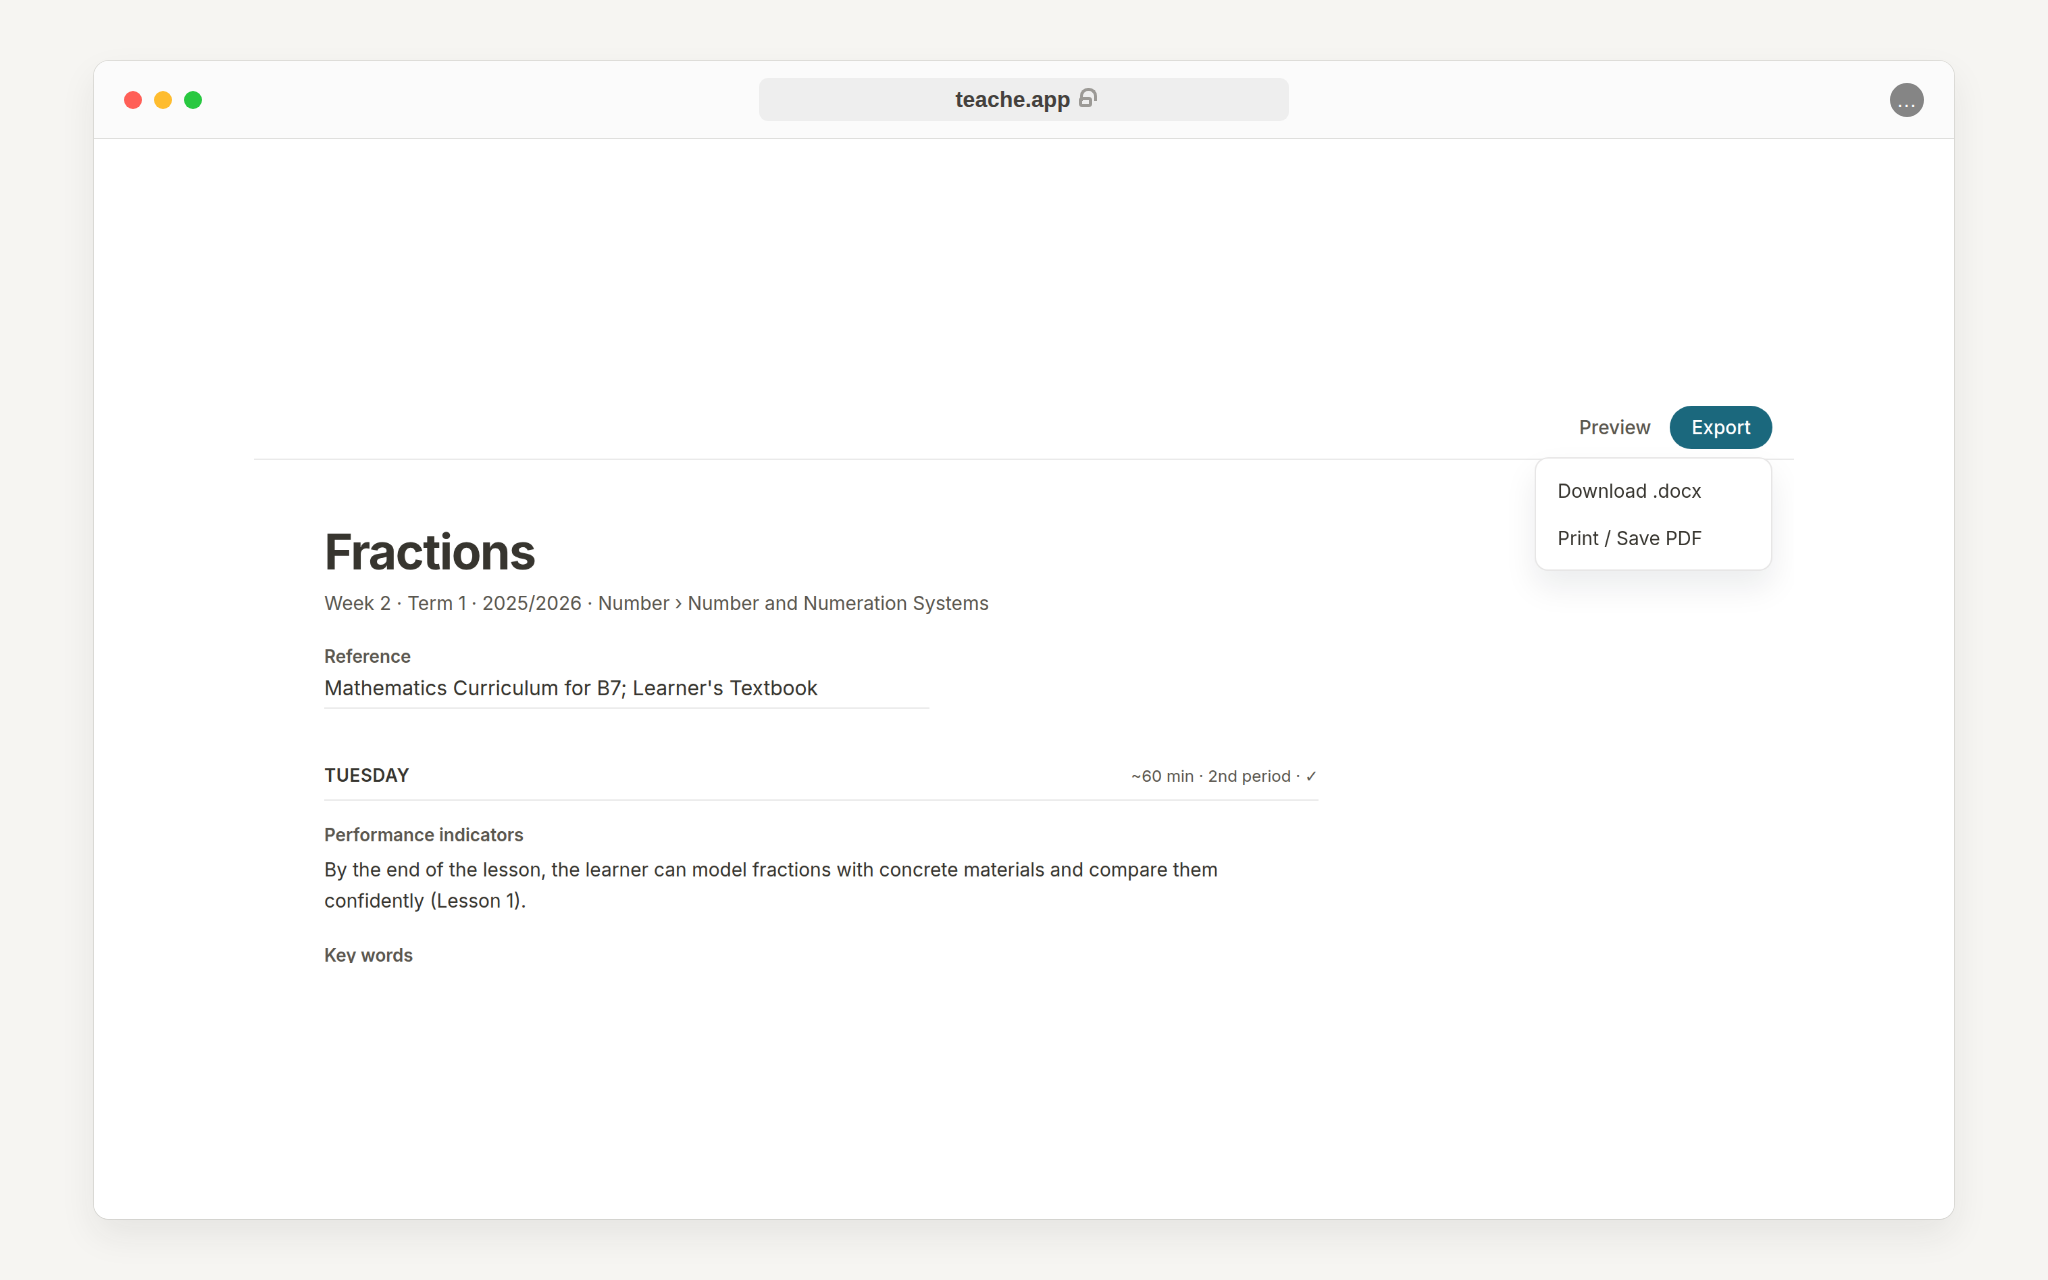
The Export menu has two options. Print / Save PDF opens your print dialog, where you can print directly or choose Save as PDF. Download .docx gives you an editable Word file if your school stores soft copies.
4. Sign and submit
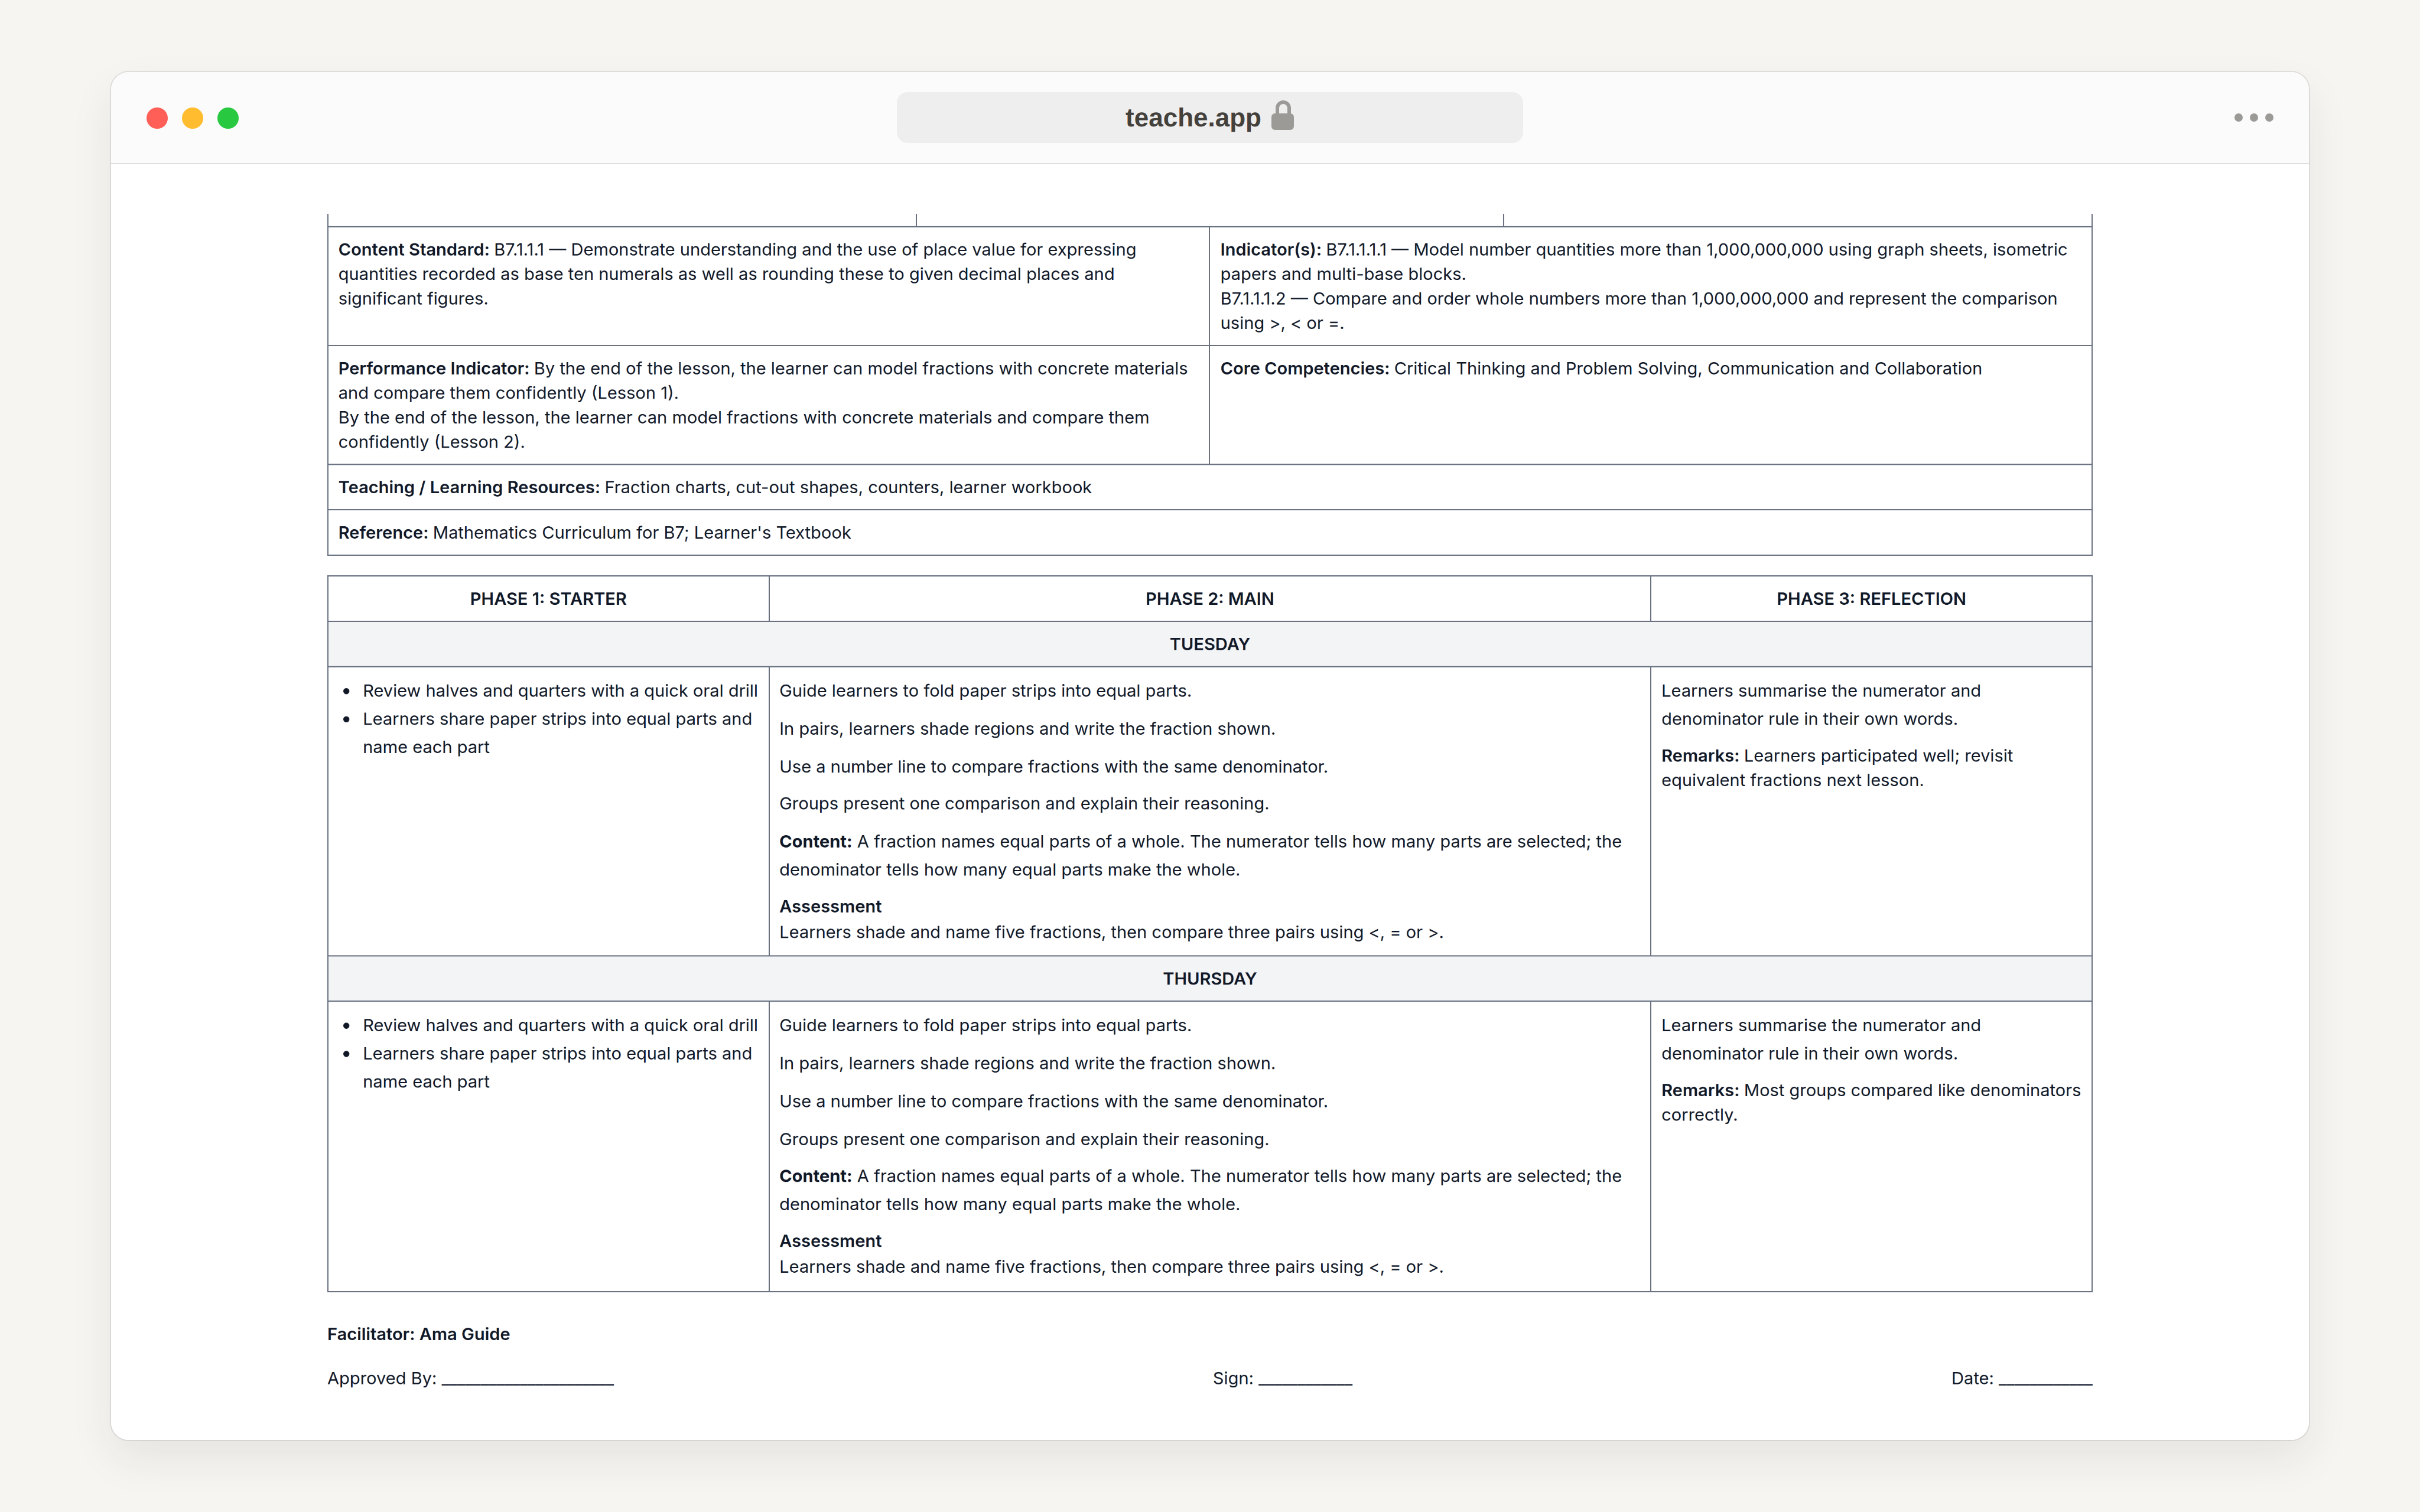
The last block of the note carries the facilitator line with your name, then Approved By, Sign and Date for the headteacher's vetting. File the signed copy the way you always have. teache keeps the digital original if you ever need to reprint.
For what a headteacher actually checks before signing, read how to pass vetting the first time.
New to teache? Start with create your first lesson note.